Creating the data warehouse tables
Compose create two types of data warehouse tables: staging tables (indicated by the TSTG prefix) and the actual data warehouse tables (indicated by the TDWH prefix).
In addition, Compose automatically creates views for the TDWH tables in the following format:
<schema_name>.VDWH_<entity_name>[satellite_number_if_several]
Example:
dbo.VDWH_Customers02
For each entity, Compose creates a single view containing both the satellite data and the associated hub data (or only the hub data if the entity has no satellites). If an entity has several satellites, then Compose will create a view for each of the satellite tables. In such a case, the view name will be suffixed with the user-defined satellite number as in the example above.
Compose for Data Warehouses adds RUNNO_INSERT and RUNNO_UPDATE columns to both the Data Warehouse tables and the data mart tables. These columns contains the ETL task run number, which can be used (in the Run Details window or in the Details tab) to find out more information about the task (e.g. the number of rows updated or inserted per table). Note that in hub tables and type 1 dimensions, the RUNNO_UPDATE number will usually be higher than the RUNNO_INSERT number as these tables do not contain any history. In satellite tables or type 2 dimension tables however, the RUNNO_INSERT number and the RUNNO_UPDATE number will always be the same as a new row is inserted for each update (i.e. history is retained).
Data Warehouse views that contain both hub and satellite data will contain two RUNNO_INSERT and two RUNNO_UPDATE columns. The hub table RUNNO columns are appended with an "_H" (e.g. RUNNO_INSERT_H) while the satellite table table RUNNO columns are appended with an "_S" e.g. RUNNO_UPDATE_S).
To create the data warehouse tables:
-
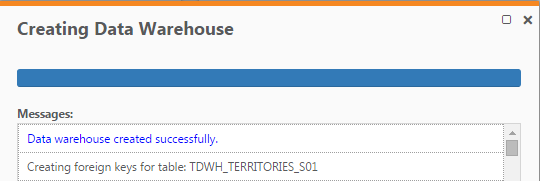
Click the Create button in the bottom right of the Data Warehouse panel. The Creating Data Warehouse window opens.
A progress bar indicates the current progress. For each stage of the Data Warehouse generation process, a corresponding message appears in the Messages list.
 Information note
When creating table in a Microsoft SQL Server data warehouse, you may encounter the following error:
Data warehouse creation failed. Error: Cannot create a row of size 11272 which is greater than the allowable maximum row size of 8060.
The statement has been terminated.
This is a well-documented Microsoft SQL Server limitation. To work around this limitation you need to split the offending table(s) into smaller tables.
- When the "Data warehouse created successfully" message appears, click Close.
